Not a lot of content about this task on internet. Nothing is really complex but you need to follow the steps corretly otherwise you 3D applications will become unusable.
In my case, here few details about the infrastructure:
– Dell R730 servers
– nVIDIA M60
– Two servers within a dedicated vSphere cluster
– Current ESXi version 6.0.0
First things first : Put the host in maintenance mode.
This will ensure that no VM is running on the host.
Step 1 : Remove the nVidia driver
Stop the xorg service (used for 3D purposes) by running the command:
/etc/init.d/xorg stop
Remove the NVIDIA VMkernel driver by running the command:
vmkload_mod -u nvidia
Identify the NVIDIA VIB name by running this command:
esxcli software vib list | grep NVIDIA

Remove the VIB by running the command:
esxcli software vib remove -n NAMEOFNVIDIAVIB

Step 2 : Upgrade your ESXi host
Before upgrading the ESXi version, i prefere to update all firmwares. This is not a mandatory step.
I used the Platform Specific Bootable ISO provided by DELL.
I will not explain all the task related to perform an upgrade of an ESXi, kid should be able to it with vSphere update manager.
Step 3 : Install the new nVIDIA driver
When you now have a freshly updated ESXi, you’ll need to reinstall the nVIDIA driver.
You can get all needed binaries on the nVIDIA Portal . Remember that you’ll need an account with a valid licence.
At the time i’m writing this post 9.0 version is really new, it seems that this version cause a lot of PSOD and BSOD.
I decided to for the “older” version 7.3 which have been updated several times.
Update the vib to a datastore and then type the command :
esxcli software vib install -v nameofthevib.vib
Step 4 : Uninstall the driver inside your target VM or template
Perform a clean uninstall inside your VM trough the control panel
Step 5 : Install the new driver inside your target VM or Template
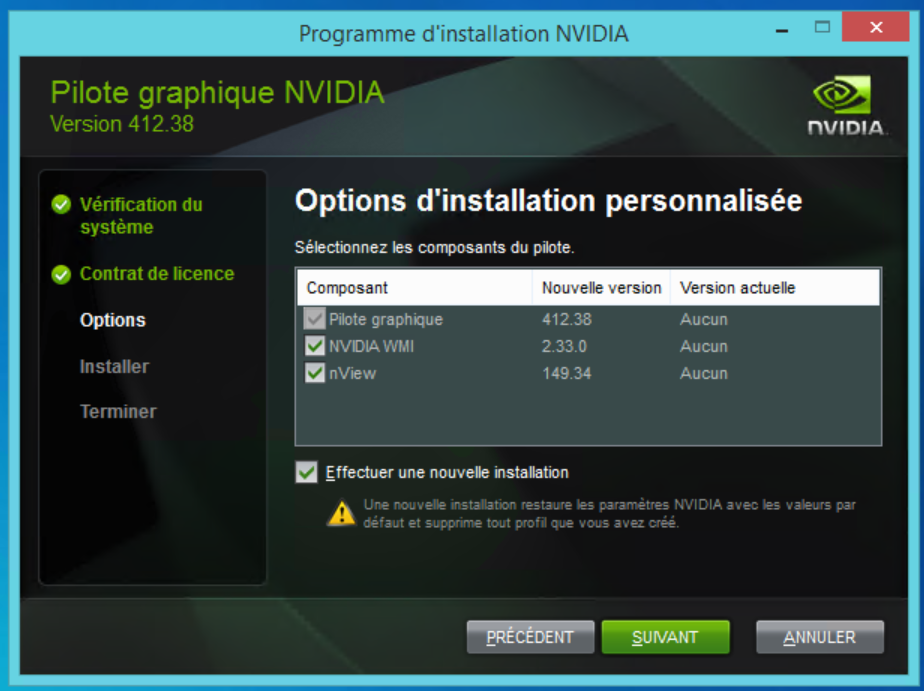
Install the new driver and ensure to perform a fresh install by follow those steps :

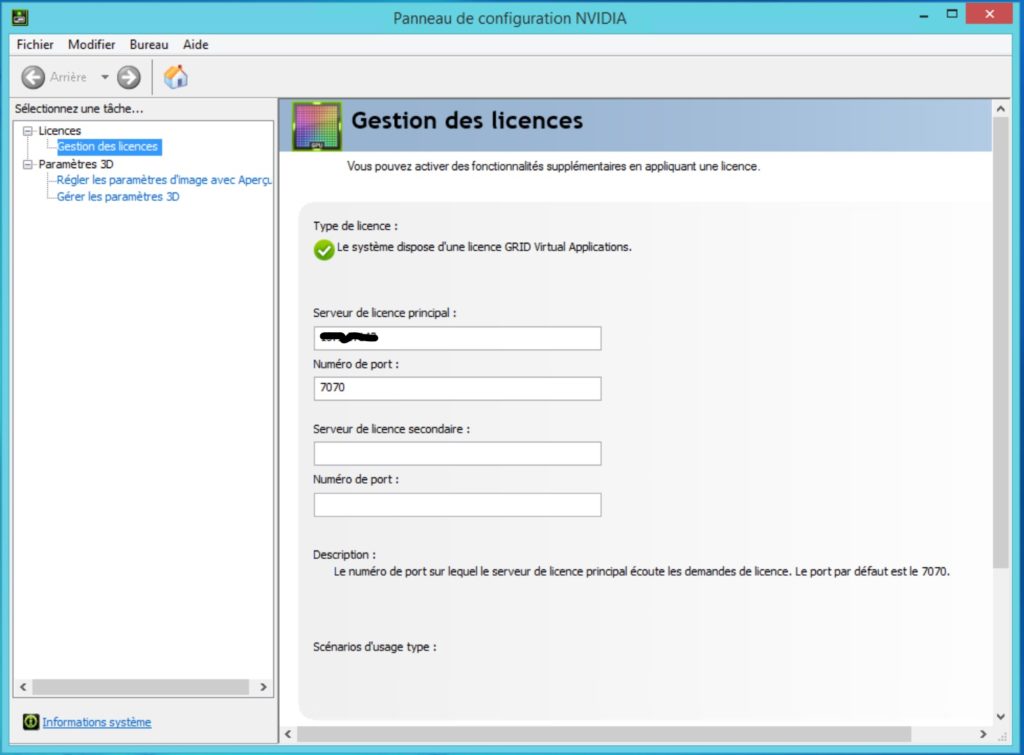
Step 6 : configure the licence server inside your VM.
Go into the nVIDIA control panel and configure your target licence server (default port is 7070)

Step 7 : Ensure that your VM is consuming license.
In the web interface of your nVIDIA licence server (http://licenceServerIP:8080/licserver) you should be able to see your virtual machines:

If not, few frequent behavior:
– VM is not able to communicate with the licence server : firewall issue, wrong port,… Telnet is your friend 😉
– You chose a GPU profile whose you don’t have any licence.
Keep in mind that if you’re using the wrong licence or an expired one, you’ll be limited to 3FPS…
Few usefull links :
– The only blog speaking about nVIDIA update process
– Virtual GPU Type regarding your license
– Troobleshooting help


